ytl用python做web端自动化测试
安装环境
1.安装谷歌浏览器
2.安装对应的谷歌驱动
解压后,将chromedriver.exe放置到python的Scripts目录下
3.安装selenium
一般python自带也可用pip install selenium安装
开始编写代码
from selenium import webdriver  # 从`selenium`导入`webdriver`网络驱动
import time  # 导入时间`time`


driver = webdriver.Chrome()  # 打开浏览器
url = driver.get(url)  # 输入网址
driver.implictitly_wait(10)  # 设置隐性等待时间10秒,当然时间自己定义
driver.set_window_size(width=,height=)  # 设置窗口大小
title = print(driver.title)  # 获取标题方法
定位元素方法
driver.find_element_by_id("username").send_keys("13612341234") #输入账号
driver.find_element_by_id("passwordSso").send_keys("123456") #输入密码
driver.find_element_by_id("subnitButton").click() #点击登入
driver.find_element_by_xpath('//[@id="layout-custom"]/div[2]/div[1]/div/a').click() #点击退出
driver.find_element_by_name("wd").send_keys("自动化") #通过name定位
driver.find_element_by_class_name("s_ipt").send_keys("selenium") #通过class定位
driver.find_element_by_tag_name("ifrane") #通过tag标签定位绝大多数重复,偶尔iframe可能唯一
driver.find_element_by_link_text("hao123").click() #通过link_text链接文本定位
driver.find_element_by_partial_link_text("hao123").click() #通过partial_link_text部分链接文本定位
driver.find_element_by_css_selector("#kw").send_keys("css定位") #通过css_selector css选择器定位
driver.find_element_by_class_name("mnav")[1].click()
.clear() # 清理内容
.click() # 点击
.send_keys() # 输入内容
内联框架标签
self.driver.switch_to_frame("oppoRtcAsIframe") # 要先切换到iframe 先定位到iframe元素默认以iframe的id或者name定位
# 如果该框架没有id或name,可以通过其他定位方式找到该框架在切到该框架,
# 如:
el = driver.find_element_by_xpath('//*[@id="oppoRtcAsIframe"]')
driver.switch_to.frame(el)
# 在定位它下面的元素,
# 内联框架完成相关操作之后可以用下方法跳出iframe
driver.switch_to.parent_frame() # 跳出该框架
driver.switch_to.default_content() # 跳到最外层页面
driver.switch_to_window(i) # 切换到新的窗口在进行其他操作ui自动化框架unittest
先看一下目录结构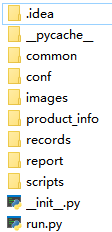
说明:
common # 编写公共类方法目录
conf # 配置的信息
imgaes # 错误截图保存目录
product_info # 自动获取的产品信息
records # 脚本录制视频保存目录
report # 生成报告保存目录
scripts # 编写脚本目录
run # 总运行入口,运行测试脚本生成测试报告
from selenium import webdriver
import unittest
import yaml
import os
import time
from common.configTime import *

configure_path = os.path.join(os.getcwd(),"configure.yml")  # 配置文件路径,后面直接调用这些配置就行
with open(configure_path,"r") as f:  # yaml方法获取配置信息
    data = yaml.load(f.read())
    # print(data["URL"])


class MyTest(unittest.TestCase):
    def __init__(self):
        self.driver = webdriver.Chrome()  # 定义驱动
        self.driver.maximize_window()  # 窗口最大化
        self.driver.implicitly_wait(20)  # 设置隐性等待时间
        self.driver.get(data["URL"])  # 输入网址

    @classmethod
    def setUpClass(self) -> None:
        """整个测试用例的前置条件"""
        print("开始 自动化测试")

    @classmethod
    def tearDownClass(self) -> None:
        """print("所有用例的后置条件")"""

    def setUp(self) -> None:
        """print("每条用例的前置条件")"""
        time.sleep(0.5)

    def tearDown(self) -> None:
        """print("每条用例的后置条件")"""
        time.sleep(0.5)

    def test01(self):
        time.sleep(1)
        self.driver.find_element_by_link_text('Sign In').click()  # 点击你好,请登入
        self.driver.find_element_by_id('fm-login-id').send_keys(data['name01'])  # 输入账号
        self.driver.find_element_by_id('fm-login-password').send_keys(data['password01'])  # 输入密码
        self.driver.find_element_by_id('fm-login-submit').click()  # 点击登入
        print("成功")

    def test02(self):
        time.sleep(1)
        self.driver.find_element_by_link_text('Sign In').click()  # 点击你好,请登入
        self.driver.find_element_by_id('fm-login-id').send_keys(data['name02'])  # 输入账号
        self.driver.find_element_by_id('fm-login-password').send_keys(data['password02'])  # 输入密码
        self.driver.find_element_by_id('fm-login-submit').click()  # 点击登入
        print("成功")

    def testN(self):
        time.sleep(1)
        self.driver.find_element_by_link_text('Sign In').click()  # 点击你好,请登入
        self.driver.find_element_by_id('fm-login-id').send_keys(data['nameN'])  # 输入账号
        self.driver.find_element_by_id('fm-login-password').send_keys(data['passwordN'])  # 输入密码
        self.driver.find_element_by_id('fm-login-submit').click()  # 点击登入

if __name__ == '__main__':
    unittest.main()
生成测试报告
import unittest
from unittestreport import TestRunner
from common.configTime import *
from product_info.info import *


class AllTest():
    def __init__(self):
        pass

    def run(self):
        """运行脚本用例生成测试报告"""
        a = config_report_time_path()  # 配置包名时间和路径
        case_push = a[0]  # 用例路径
        report_name = a[1]  # 报告名
        report_push = a[2]  # 报告路径
        suite = unittest.defaultTestLoader.discover(case_push)  # 加载测试用例
        TestRunner(suite,
                   filename=report_name,
                   report_dir=report_push,
                   title="测试报告",
                   tester="你自己的名字",
                   desc=f"报告信息",
                   templates=1).rerun_run(count=0, interval=2)  # 失败重运行次数


if __name__ == '__main__':
    run = AllTest()
    run.run()